Installing the SteppIR 3el Antenna
Assembling the 3 El SteppIR
It's shipped!
I got an email today (March 24, 2004) from FluidMotion indicating they were ready to ship. UPS confirms it will be here Wednesday, March 31st.
The plan is to assemble the antenna on Thursday and get it into the air on Friday, Saturday or Sunday. I can hardly wait!
It's Here!
I was busy today getting ready for the assembly day tomorrow. Pal Dave Johnson, K4SSU, (my tower guy) came by to do a site review and pronounced the installation "trivial". I invited another couple of ham friends to come over tomorrow to assist (that's "perform") the construction of the antenna and Dave agreed to come later in the day to get it onto the tower.
And then, I promptly forgot about it all.
A few minutes ago, Gael (my bride) came in from the hot tub and said, "Wasn't the antenna supposed to be delivered today?"
Ohmigawd! I've got four people coming over to assemble the antenna -- and no antenna! I quickly went to the UPS site and checked on the shipment -- and found it was delivered at 5:10pm and left by the "side door". I rushed out to the garage, raised the door ...
And There It Was!!!
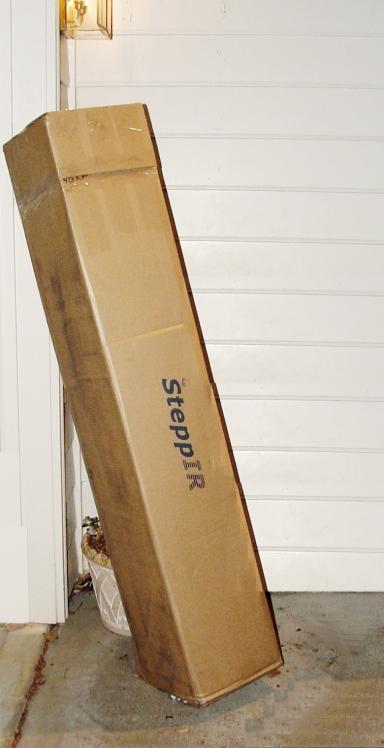
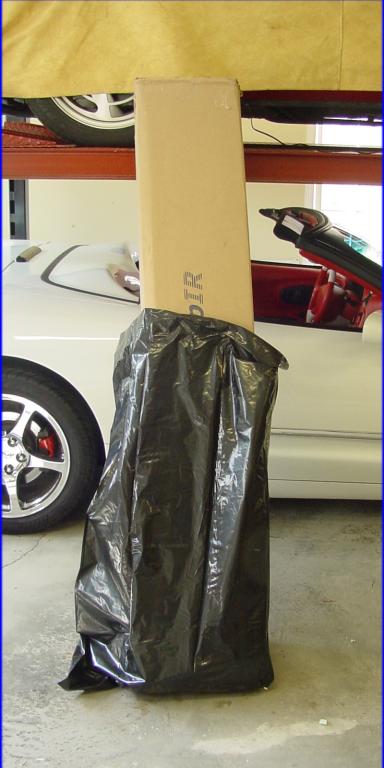
Yep. 12" x 12" x 67" of solid (65lb) ham joy!
I'd read that there had been criticism of SteppIR's packaging; that some boxes had been delivered damaged. I can tell you that this package arrived in good shape.
Tune in tomorrow for the unpacking and assembly party!
Assembly Day
I know, I know, today was supposed to see the antenna in the air. It didn't happen as Dave (my tower guy) had a "real work" thing that took up his whole day; bummer! But it wasn't for naught; we got the antenna 90% assembled.
This morning my friends Bill WB4WMG, Bill N4NX, Don N4DK and Rich (not a ham -- at least not in this sense) were scheduled to arrive for the assembly party. Before they came I decide to unpack everything. I moved my bride's car out to the street (she's used to that) to free up half the garage for the assembly:
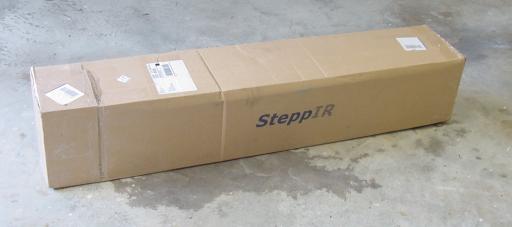 The package seemed to have about a half-cubic foot "cap" on it so I removed it..
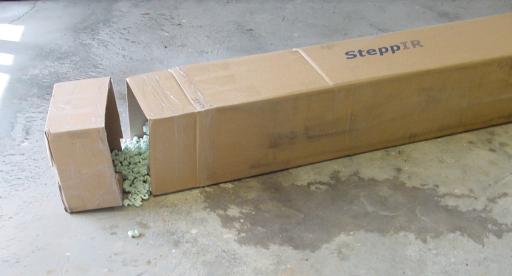
 ..and found the box nearly full of what my daughter calls "angel turds". I understand the reason for packing peanuts but I really hate 'em! I think I found out why the SteppIR is kinda pricey. They have their packing peanuts named after the antenna!
A peek inside shows that there is (thankfully) something more in the box besides packing peanuts. The box contains several bubble/shrinkwrapped subassemblies:
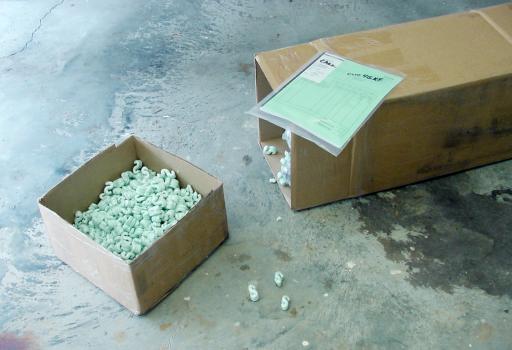
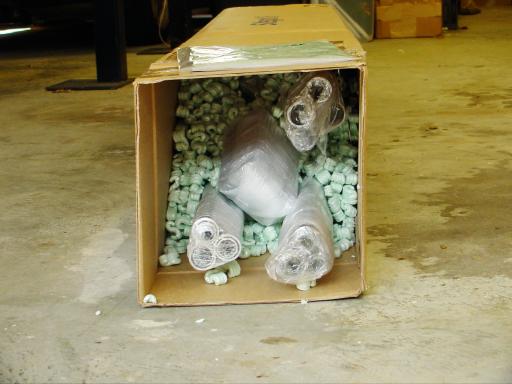 I pulled out the big pieces and then inverted the box into a trashbag to get to the smaller packages:
 Here's what I thought (at the time) was all the stuff:
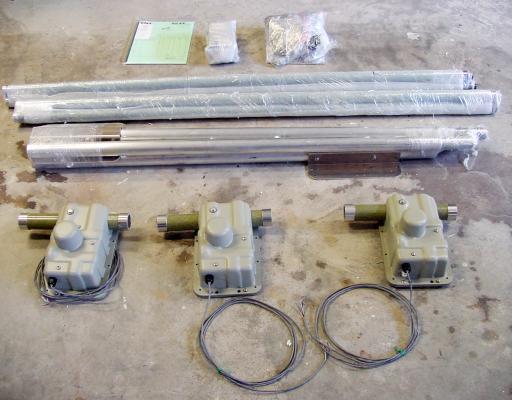
 At the top, left to right are:
- Two of the element housing units (they call them "EHU"s)
- The instruction manual, the control box, the hardware/accessory pack and the third EHU
- The element support tubes (you guessed it, "EST"s); two packs of three tubes
- The boom (in four pieces
At this point I thought that was everything. Here are the EHUs unwrapped:
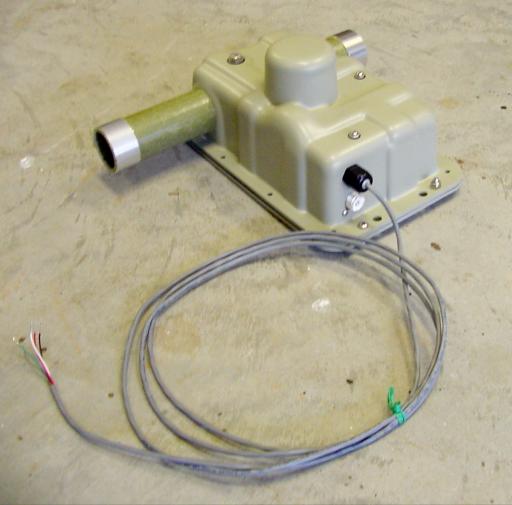
 The two on the left are identical and are used for the director and reflector. The one on the right is for the driven element; you can see the SO-239 for the coax just below the control cable exit port. Here's a closer look at the EHU for the driven element:
 A quick review of the item list revealed that I was missing a few things. I dug them out of the trash bag full of packing peanuts:
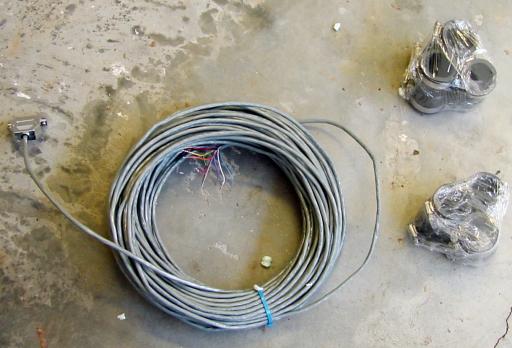 This is 150' of control cable (with the control-box-end thoughtfully terminated with a DB25 connector) and two packages with the EHU-to-EST attachment hardware. I'm glad I found these because they're going to come in very handy!
The crew arrived and we set about about assembling the boom. Here's Bill WB4WMG with the four sections making up the boom
 The factory had pre-assembled and then dismantled it; each section was marked for proper reassembly. Notice the small puddle of WD-40 used to make sure the sections fit smoothly together w/o trapped moisture:
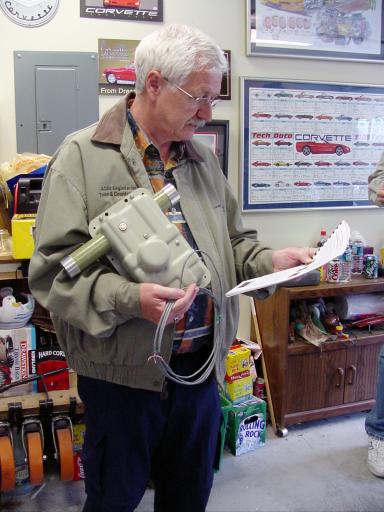
 Here's Bill, N4NX reading the instructions (we quickly broke him of that behavior). I thought you might want to see the actual size of an EHU. They're bigger (but lighter) than I expected:
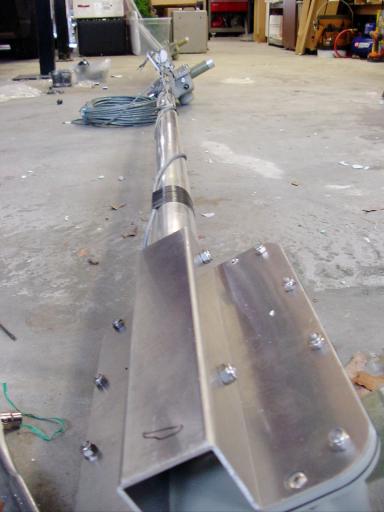
 In case you think I only take pictures, here's me working on the boom-to-mast plate:
 Bill and Bill attaching the EHU for the director element:
 Here's the EHU for the driven element mounted on the boom next to the boom-to-mast clamp. First and second glitches in the instructions: The instructions say to mount the EHU to the boom bracket with a screw, a flatwasher, a lockwasher and a nut. The parts bag didn't have any lockwashers but the nuts were the locking type. We went forward. Then the instructions say to attach the EHU to the bracket using four screws. I did, but..
 I noticed that after it's done there are four unused holes. There were also twelve extra screws, flatwashers and locknuts. I called SteppIR and they confirmed that they added more holes and hardware but didn't update the manual.
We'd already figured this out but the phone call didn't hurt. We also found another error in the manual when it came to the ESTs and wrapping the joints. I'll mention that at the appropriate time later.
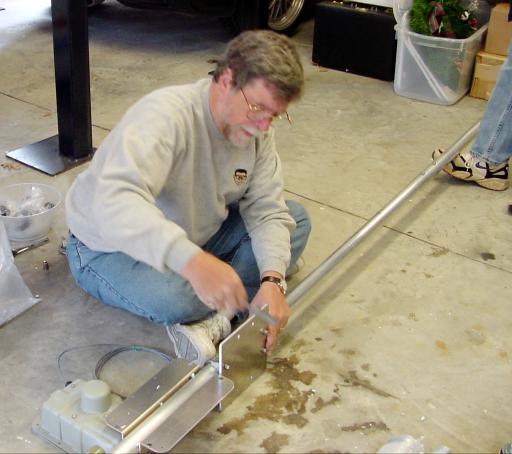
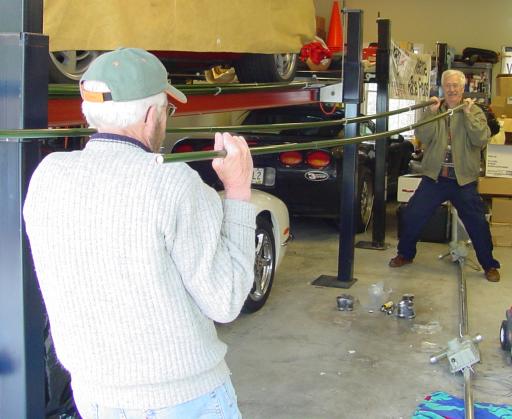
Now we turned our attention to the element support tubes (ESTs). There were two packages of three tubes each and they are all identical. Rich and Bill unwrapped 'em:
 Here are my principal helpers (Don N4DK hadn't arrived yet) with half of the ESTs:

This is Bill WB4WMG, Rich and Bill, N4NX
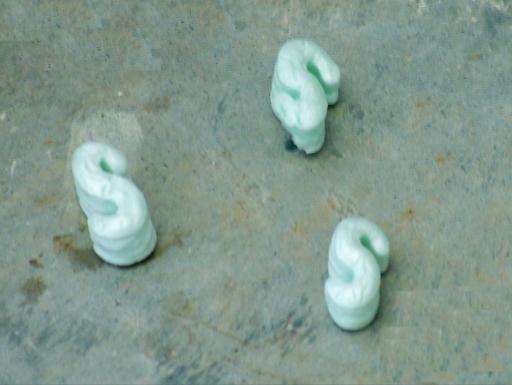
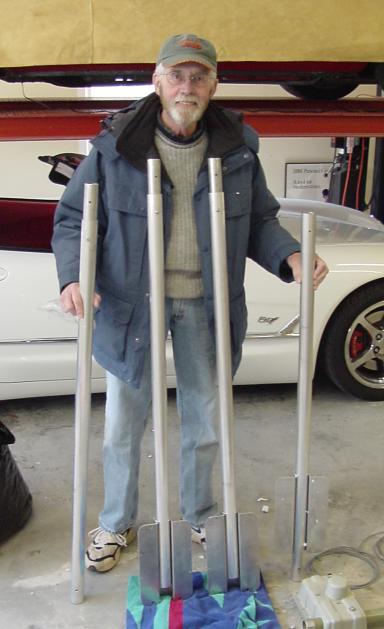
The two Bills with both halves of one of the ESTs. They just look heavy  . Notice the end of the element has a foam plug in place. Each element tip has this plug which allows any accumulated moisture to escape and denys entry by tiny critters: . Notice the end of the element has a foam plug in place. Each element tip has this plug which allows any accumulated moisture to escape and denys entry by tiny critters:
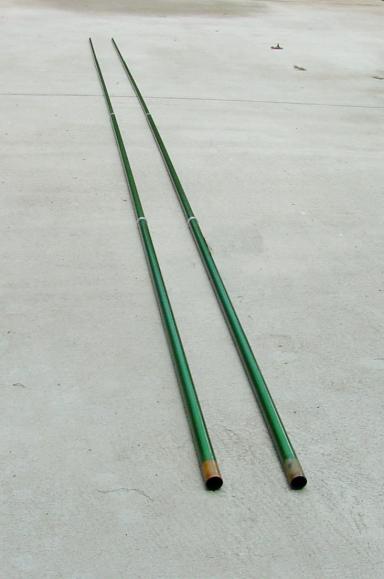
 Once the four-part, nested ESTs were pulled, twisted and locked into functionally identical rigid, tapered hollow tubes (17' 8" long)..
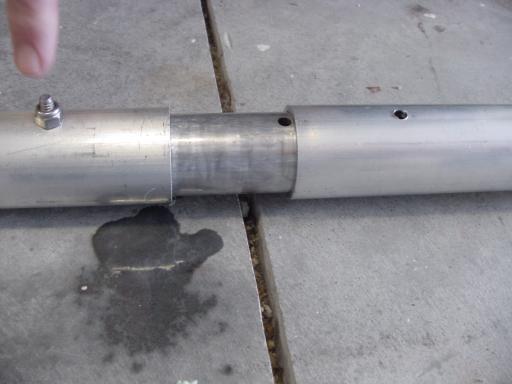
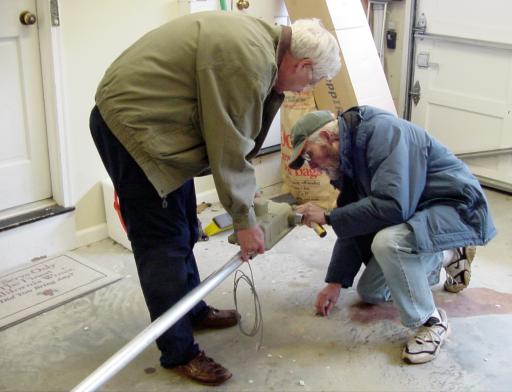
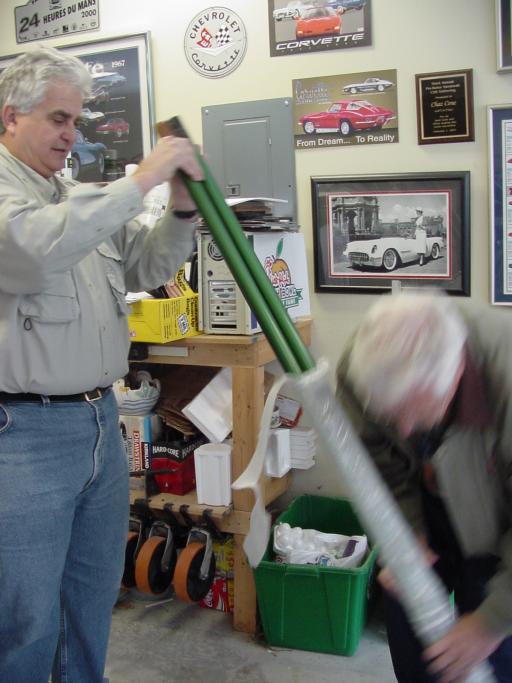
 .. it was time to do the joint weatherproofing with two coats of tape. The first coat is regular electrical tape (provided). You wrap from about 1/2" on either side of the joint, across the joint and back again:
 We quickly developed a technique where one person turned the tube, one applied the tape, one behaved as a fulcrum (near the wrapping person) and one watched. Worked great!
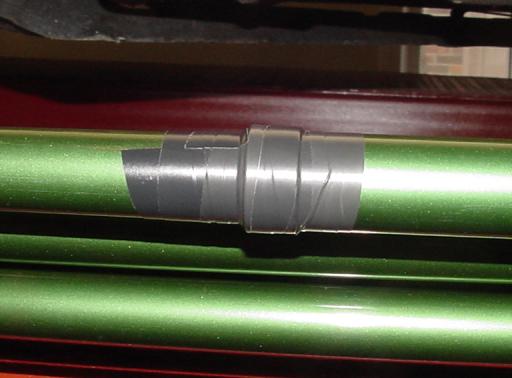
After all eighteen joints were taped with electrical tape we were ready to overtape the joints with silicone self-curing tape. Glitch #3. The instructions say to cut four pieces per tube to wrap the four joints. But there are only three joints. Our phone call (earlier) to SteppIR confirms that they've changed the spec on the tubes; they used to be five pieces with four joints -- now there are four pieces with three joints.
The special silcone tape (included) that bonds only to itself was wrapped the same way (but a little farther on each side of the joint). The technique we refined while doing the eighteen joints with electrical tape worked perfectly again.
BTW the instructions refer to it as "green self-curing silicone tape". Ours was black.
NOTE: Don't let the wrapped joints on one assembled EST contact the wrapped joint on another. This stuff sticks only to itself but sticks WELL!
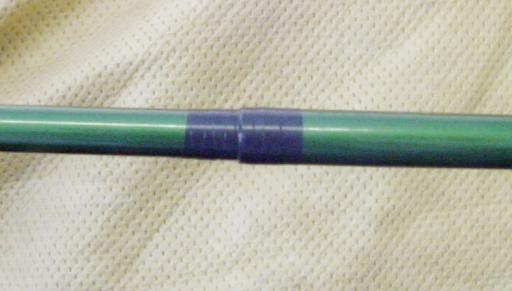
Here's a finished joint:
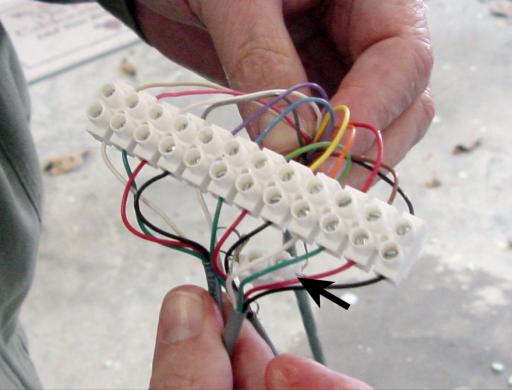
 With all six ESTs finished, we turned our attention to wiring the control cable. There is a four-wire cable from each of the EHUs that connect to a terminal block. Contrary to what you might think logically, the four wires from the driven element are first, then the director, then the reflector.
I've read of installation errors where it was done director, driven, reflector (as the elements lie on the boom) but that's wrong!
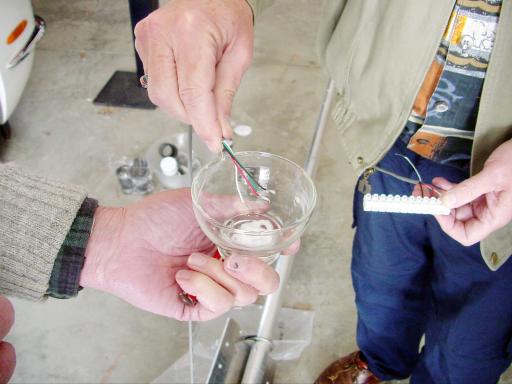
Just following the instructions which are very specific re color and order, it was easy. To ensure a good connection on the terminal block, SteppIR provides a packet of "connector conductivity enhancer" that we squeezed into a dish and dipped the stripped end of each wire before connecting it to the terminal block:
 Once the connections are made from the EHUs to one side of the terminal block, the 12-wire control cable is attached to the other side. Ground wires from each EHU and the control cable are connected together in another, one-terminal block.
Here you see the finished terminal block (with the single terminal block for the ground wires barely visible):
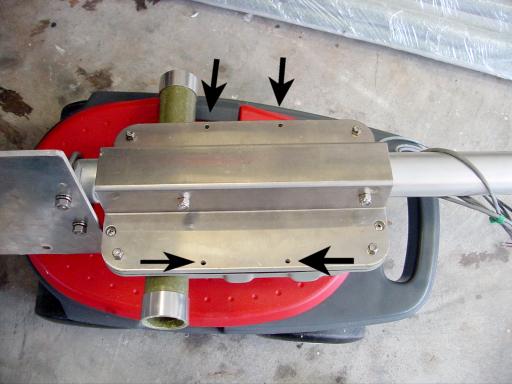
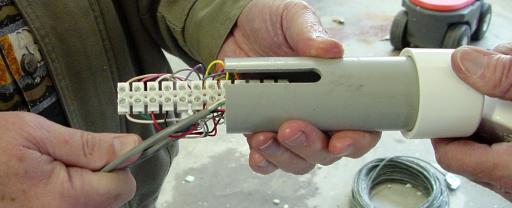
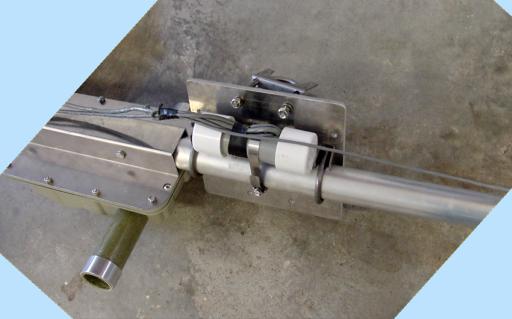
 Now the terminal blocks and all four sets of wires (three from the EHUs and the control cable to the shack) are folded parallel to the terminal block in a bunch and the whole thing inserted in a plastic enclosure (looks like a balun but it's not!). The wires will be routed through that slot and the whole assembly capped and mounted to the boom next to the mast plate:
 Here it is mounted using the hose clamp (provided). You're looking at the bottom of the boom with the slot for the cables "up"; when the boom is in place, the slot will be toward the ground so any condensation can drain out:
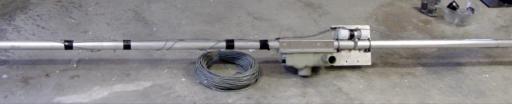
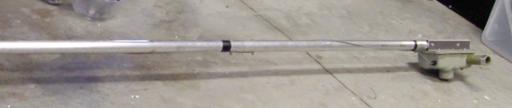
 We're all done with the boom and element assembly! Here's the director end of the boom with the control cable taped to the boom:
 ..and the driven element EHU:
 ..and the reflector element EHU:
 ..and, finally, the whole boom as seen by a mouse at the director end:
 We spent about four hours getting it this far but -- I got a call from Dave and he'll be here at 10A tomorrow to finish this up and get it on the tower!
Click HERE for the next part of the story or HERE to return to the top...
|
